Physical Address
60 Ekwema Cres, Layout 460281, Imo
Physical Address
60 Ekwema Cres, Layout 460281, Imo


FaceTime has become one avenue through which people communicate with others close to them, mostly when sharing experiences from a distance. Well, if you have wondered how to share screen on iPhone during FaceTime, then consider yourself lucky!
The feature lets you view photos, videos, or apps directly with your loved ones. Similarly, if you have an iPad, it will be pretty easy to learn how to share a screen on the iPad during FaceTime, making virtual hangouts far more interactive.
Also, if you are a Mac user, it is similarly easy. With just a few simple steps, you can learn how to share a screen on a Mac during FaceTime.
Sharing photos, apps, or documents is swift and easy with just a few taps, whether you use an iPhone, iPad, or Mac.
This article explains the iOS FaceTime share screen feature and walks you through it so you can easily connect with anyone and collaborate quickly.
Now, let’s explore this FaceTime screen sharing guide further and discover how to enrich your virtual conversations even more!
FaceTime lets you share your iPhone, iPad, or Mac screen during a call with someone using Screen Sharing. This helps in many situations, like presentations, troubleshooting, or when you must present some content to others in real time.
To do so, one can learn how to share a screen on an iPhone during FaceTime by selecting the Share Content option in the call menu.
The process does not change much when considering how to share a screen on an iPad during FaceTime and how to share a screen on a Mac during FaceTime.
iOS FaceTime is friendly to use and features smooth collaboration with its share screen option. Follow the FaceTime screen-sharing guide to learn every step and a few tips on sharing your screen.
Read Also – Simple Guide: How to Schedule a Google Meet Appointment for your Remote Team
To use FaceTime Share Screen on iOS, here are the detailed requirements:
You will need an iPhone or iPad that supports iOS 15 and above. The Share Screen feature is not available in earlier iOS versions.
To check your iOS version, go to Settings → General → About. If you are not up-to-date, you can update by following these steps: Settings → General → Software Update.
FaceTime screen sharing will work only when you and the person you share with have an Apple device. This means their iPhone or iPad must run iOS 15 or later.
Unfortunately, screen sharing doesn’t work when one user is using a non-Apple device, even though they may be on the call via a web browser.
A strong and stable internet connection is key to providing a seamless screen-sharing experience. This is true not only for the host but also for the other person on the call.
The use of Wi-Fi is recommended; using mobile data might provide a mediocre video and some problems with connectivity, which could further hamper the session of sharing screens.
FaceTime requires that the two users sign in using their Apple ID. The application will not work without signing in.
You can check whether you are signed in through Settings > FaceTime. If you see your Apple ID is on, then you may connect and share your screen during calls.
The Share Screen option will only be available when FaceTime calls are active. Once you initiate or join the call, you should be able to see the screen presentation option “Share Content.”
It is a feature that will not be found if the call is not live-meaning you have to be in an active call for you to be able to enable the feature.
Fulfilling all these requirements enables you to easily use the Share Screen feature with FaceTime and enjoy sharing content with other people while on the call.
Also Read – New iPhone 16 Series: Everything You Need to Know
Follow the steps to share your screen on an iPhone during FaceTime. You can share your screen from an iPhone if you work with iOS 15 or later.
Open the FaceTime application on your iPhone and make a video call. You may also want to make a new call or join an existing call.
Once the call is initiated, locate the screen-sharing icon, represented by a rectangle with the bottom containing an icon of a person. Tap to share your screen.
Once tapped, your iPhone will pop up and ask whether you want to share your screen. Tap “Share My Screen” to proceed.
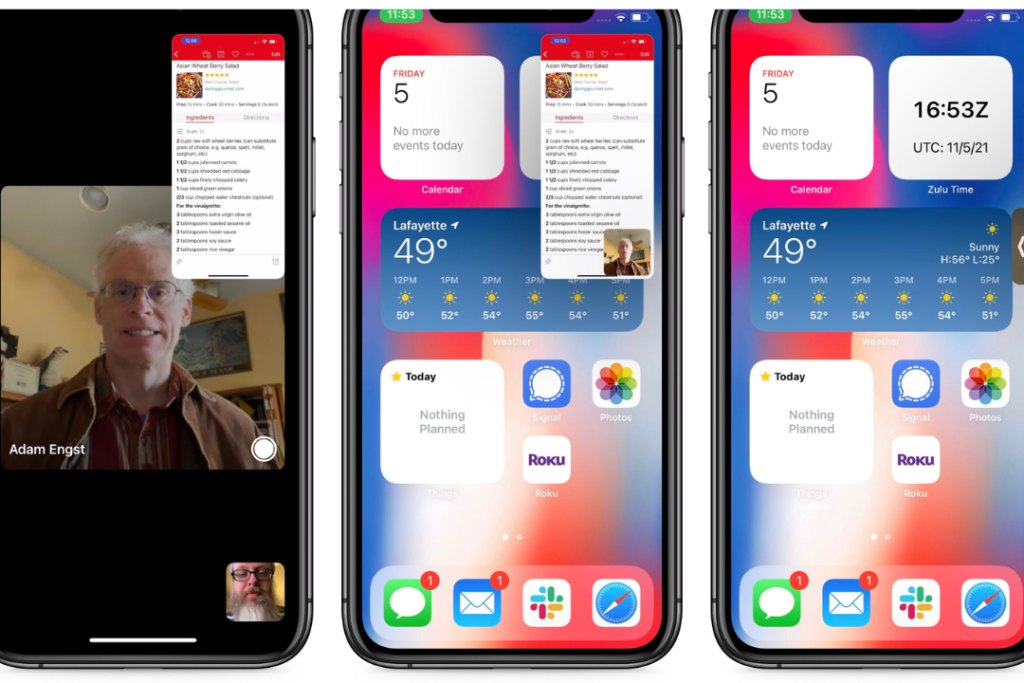
When It’s On, whatever is on your screen begins to stream to the person on the other end of the call. Now, you can scroll through any app or content on your phone. The person on the other end sees everything you do in real-time.
When you’re finished, tap the screen to reopen the FaceTime menu. Tap the screen-sharing button to stop it.

Here is the step-by-step guide to sharing screens on iPad during FaceTime calls, which works precisely for iPads.
Open the FaceTime application on your iPad and tap the “New FaceTime” button to start a new call. Now, select the person you want to call.
With the call connected, tap the screen-sharing icon rectangle with a person in front of in the FaceTime call controls. Tap to start sharing your screen.
Immediately after tapping the screen-sharing icon, one of the options will say, “Share My Screen.” Just tap on it, and after a small countdown, your screen will start sharing with the other person.
With your screen shared now, you can pull up any app and document you want to show to the person on the call, even web pages. They instantly see what you do.
You will have to tap the screen to bring the call controls back and tap the icon for screen sharing again to disable it.
Read Also – VIDEO: ‘Creativity Cannot be Crushed’: Samsung Ad Mocks Apple IPad Pro
If any of the participants of FaceTime wants to take over the screen sharing, here is what they shall do:

If you are on Mac for your FaceTime call and would like to share your screen, here’s how to share your screen on Mac during Facetime – pretty similar to the previous steps:
Follow the steps below to start screen sharing on FaceTime: Open the FaceTime application on your Mac and either initiate or receive a call as you normally would.
After being on a call, you can see the menu bar for FaceTime at the top of the screen. From the menu, click “FaceTime,” then select “Screen Share.” This will give you options for what you would like to share.
You can choose to share your whole screen or even a window. If you select “Screen,” then others on the call will see everything you are doing. If you select a window, only that application will be shared.
Once you have made your selection, tap “Share.” Your contact will now see in real time what’s on your screen. Just one of the ways iOS FaceTime is designed to make collaboration really easy.
In order to stop sharing the screen, click “Stop Sharing” at the top of your screen.
Also Read – Microsoft’s Launches New Windows App for Macs and Mobile Devices
Yes, shared screens can be controlled on FaceTime, under certain conditions. If a person shares his screen, then by default, nobody has its control unless pre-decided.
However, sharing can allow for control when both participants are on Macs. To do this, the sharer must select “Allow Control” once in the screen share.
The viewer will then have to request permission to control the screen, which the sharer will then need to accept. This would further facilitate collaboration on troubleshooting or executing a task jointly.
You can share various forms of content in FaceTime, which improves your communication experience.
Please always note that compatibility between both parties’ software versions must be met for the most effective use of these features.
Read Also – Try a Mac for Your Business Without Any Risk at Digicape
Knowing how to share screens on an iPhone during FaceTime, how to share screens on an iPad during FaceTime, and how to share screens on a Mac during FaceTime, here are some tips to ensure it goes through as smoothly as possible. These include:
By following these tips, you can ensure that your FaceTime screen sharing is effective and enjoyable.
Read Also – Latest iPhone Models List: iPhone Models with Pictures from 2007 to 2024
For the most part, iOS FaceTime share screen does not give you any trouble; however, a few problems you may run into include:
If the receiving party sees only a black or blank screen, ensure that you have selected the correct sharing option and that you have not minimized or closed the app you wanted to share.
When your screen sharing tends to lag, simplify what you are sharing. You may want to close other unnecessary applications or tabs to free up resources. You can also ask the recipient to check their internet connection, as it might cause the performance to lag.
Some apps may limit sharing to FaceTime. Please check the documentation of that app to see if it requires certain compatibility modes or settings for proper screen sharing.
By following these steps and troubleshooting tips, you will be able to use FaceTime’s screen sharing feature across your devices.
Sharing your screen with someone on a FaceTime call is pretty easy, whether it be an iPhone, iPad, or Mac, and drives your point home. This iOS FaceTime share screen feature lets you show photos, apps, or even the entire screen without much fuss.
This FaceTime screen sharing guide has made it easy for you to learn how to share screens on the iPhone, share the screen on an iPad, and share a screen on a Mac by following some pretty easy steps.
If you found this article helpful, let us know your thoughts and comments below. We would love to hear from you. Follow us on our social media handles; like our Facebook page @Silicon Africa, Instagram @Siliconafricatech and Twitter @siliconafritech.
Screen sharing is available on iPhones and iPads with iOS 15.1 and later, and on Macs with macOS 12.1 and later.
During a FaceTime call on Mac, you can share your entire screen or window of an application.
Your screen will continue to be shared even if you switch out of the FaceTime application. During this time, notifications are hidden.
No, those without an Apple product can only join using a web browser; thus, sharing is only available with Apple owners.