Physical Address
60 Ekwema Cres, Layout 460281, Imo
Physical Address
60 Ekwema Cres, Layout 460281, Imo

Knowing how to set up Starlink Internet should not be a problem after you have been able to purchase it. Setting up your Starlink satellite dish is so much like setting up a DSTV or GOTV box and dish, but the cool thing is, you don’t need to hire anyone to help with the internet dish. Starlink is designed for easy self-installation.
It is no longer news that Elon Musk’s SpaceX has launched Starlink in Nigeria, and they’re offering 150Mbps speeds with a super simple setup.
If you live in Nigeria, you probably know that many people struggle with expensive and slow internet from traditional providers, most of which still rely on 3G and 4G.
Setting up the Starlink at your home for the first time is not as difficult as it may seem. With just the right steps, you are good to go.
In this guide, we’ll walk you through how to get your Starlink equipment, set up your dish, and install the Starlink router. We’ll also throw in some extra tips to help you get the best service from Starlink.
Starlink is a satellite internet service created by Elon Musk’s company, SpaceX. It uses thousands of low-Earth-orbit (LEO) satellites to provide high-speed internet, even in places where traditional cable or fiber networks aren’t available.
You may want to consider getting it instead of looking for ways to boost your network.
While it might not be as fast as those options, it’s a great choice for rural areas where DSL and older satellite services are the only alternatives.
See also: Starlink to Enhance Internet Service in Nigeria with its New Project
When you sign up for Starlink in Nigeria, you’ll need to buy the equipment upfront, which costs about $600 (around NGN 900,000).
After that, the service costs $43 per month (NGN 64,500) with no ongoing equipment fees. There’s no long-term contract, so you can start or stop your service whenever you want.
Payments can be made using a dollar card from any Nigerian bank. You can as well use your Upay card to make dollar payments.
Starlink users in Nigeria typically experience download speeds between 50-200 Mbps. The hardware usually ships within 1-2 weeks after you place your order.
There are a couple of cool things about Starlink. Firstly, there’s no data cap, so you can use it as much as you want for work, school, streaming, or gaming without worrying about extra fees.
Plus, you don’t need to sign a contract—you pay month to month through the Starlink app and can cancel or pause anytime.
See also: Starlink is Set to Restrict Roaming in Unlicensed Areas
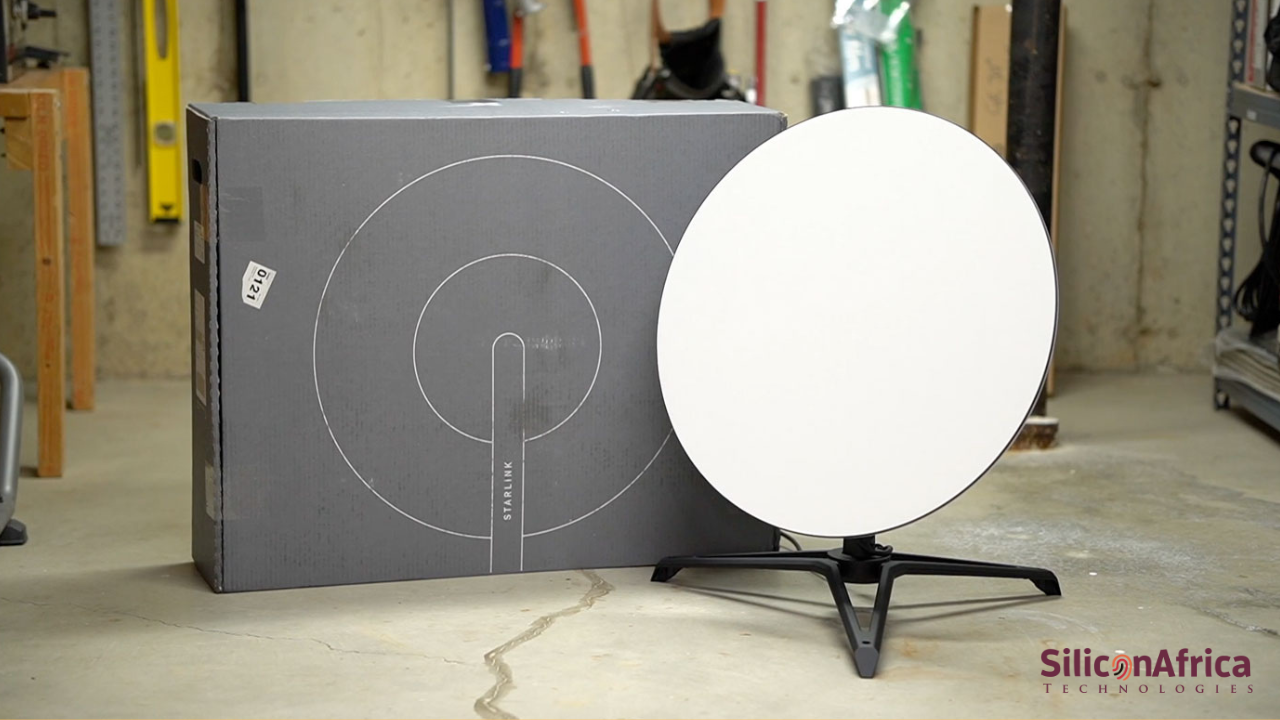
The Starlink installation kit includes everything you need to get started: a Starlink dish with a kickstand, a base unit for the router, a power cable, and a 75-foot cable to connect the router to the dish.
If you need a longer cable, you can buy one from the Starlink store, along with other accessories like mounting hardware and adapters.
The kit also includes a simple instruction sheet with pictures and a QR code that links to Starlink’s support site. While it might seem like you just need to plug in the router, power it up, and point the dish at the sky, there’s a bit more to it.
You’ll need to position the dish correctly, mount it securely, and possibly run a cable through an exterior wall.
Fortunately, we’ve got some helpful tips for setting it all up, so keep reading for the best Starlink installation advice.
See also: SpaceX Pushes for Rule Changes, Aims to Greatly Increase Starlink’s Capacity
Before ordering your Starlink kit, make sure you have a good spot to mount the dish. You can do this by downloading the free Starlink obstruction app on Android (download from Google Play Store) or iOS (download from Apple App Store) and scanning the sky.
The app has an interactive tool that helps you find the best location for your dish. The key is to find a spot with an unobstructed view of the sky, at least 110 degrees clear of obstacles, to stay connected with the satellites.
Some good places to consider are open fields, rooftops, or elevated structures like poles that are clear of things like buildings, trees, and fences.
The Starlink app lets you use your phone’s camera to scan the sky from where you plan to set up the dish.
You might need to get creative with how you hold your phone to see the screen and move the camera, but aim to have the camera in the same spot where you’ll install the dish.
Unboxing your Starlink kit is quick and straightforward, but double-check that you have everything: the Starlink dish, the router, a 75-foot cable, and the power adapter.
If you’re setting up the dish in your yard or near an RV, the built-in kickstand makes it easy to place on flat ground with a clear sky view. The kickstand even has holes for stakes or screws if you want to secure it more permanently.
If you plan to mount the dish on a roof or wall, you might need to buy additional mounting hardware from the Starlink store.
See also: Starlink To Offer Satellite Internet Directly To Phones
Before setting up your dish, you’ll need to connect the router. The router powers the dish and communicates with it, so it’s best to set it up first.
The latest router model features Wi-Fi 6 and comes with an external power adapter (unlike the previous model with a built-in adapter).
It works well on a table or shelf, but if you prefer to keep it out of sight, you can buy a mounting bracket from the Starlink store.
Now, it’s time to connect the dish to the router. This might seem a bit backward since you still need to mount the dish, but you need the dish powered on and linked to your Starlink app before you can position it correctly for mounting.
If you’re setting it up outside, you might have to run the Starlink cable through an open window, or if you already have a hole in the wall, you can feed the cable through there.
Make sure you have enough cable to reach from the router to the dish’s mounting spot, with some extra for adjustments.
See also: latest Guide on How to Connect your Phone to Your Smart TV
Once you’ve found and confirmed the best spot using the app, it’s time to mount the dish. For simple setups, you can just place the dish mount on the ground.
If you’re mounting it on a roof, the built-in kickstand might work, but depending on your roof type, you might need something more specific, like a ridgeline mount for roof peaks, a pivot mount for sloped roofs, or a wall mount. The key is to ensure the dish has a clear 110-degree view of the sky and is close enough to the router to connect with the included 75-foot cable (or the 150-foot one if you bought it).
The app will guide you on how to adjust the dish to get the best satellite connection. You might need to rotate it slightly, but as long as it’s mostly facing upward, you’re almost done with the hard part.
For a temporary setup, you might be okay running the Starlink cable through an open window. But if you want a permanent installation, you’ll need to run the cable through a wall.
Starlink offers cable routing kits, including ones specifically for masonry walls. These kits come with drill bits, plastic grommets, and silicone sealant, but you’ll need your own drill.
After drilling a pilot hole and widening it to fit the cable, you’ll thread the cable through the wall and seal the hole with the provided cover and silicone caulk.
See also: HMD DeviceKit Tool for Nokia Devices: All Questions Answered & How to Download It
Once your dish is in place and the cables are all set, the final step is activating your Starlink using the Starlink app. Don’t worry—this part is super easy.
The app has a setup guide that walks you through everything step by step.
When you start the process, give it a few moments because the dish needs time to connect to the satellites. It’s quick but not instant, so a little patience goes a long way.
Once the dish locks onto the satellites, the app will let you know you’re online and prompt you to create your Wi-Fi name and password.
After that, Starlink might take up to 20 minutes to finish connecting to the satellite network, downloading updates, and booting up fully.
Even after you’re up and running, your Starlink internet might not hit its top speeds right away.
For the first 12 hours, the system will be busy downloading additional software, scanning and mapping nearby satellites, and figuring out the best positions to connect with them.
This process is automatic, so you won’t have to mess with the setup once it’s done.
See also: 16 Questions You Should Ask Your Solar Installer
After you’ve gone through all the setup steps, you should have internet access. Just keep in mind that the speeds Starlink promises in Nigeria might not kick in immediately. It could take up to 12 hours for your Starlink system to reach its peak performance.
Well, Starlink promises to offer satellite internet to phones directly to enable uninterrupted access.
During this time, the system is working in the background, updating drivers, mapping out the satellites around your dish, and fine-tuning the connections for the best possible service.
The cool part is, once it’s done, the system automatically adjusts these connections, so you won’t have to keep tweaking things to get the best speeds. Just sit back and let Starlink do its thing!
See also: 8 Ways to Speed Up a Slow Smartphone
According to the Starlink app, the Starlink router can handle up to 128 devices connected at the same time. So, whether you’ve got a house full of gadgets or you’re hosting a party, Starlink has you covered.
You can pay for Starlink using any card linked to a Nigerian bank’s domiciliary account. Dollar virtual cards also work just fine, making it convenient for anyone looking to get connected.
Yes, all Starlink subscription plans in Nigeria come with unlimited high-speed data. There are no long-term contracts or commitments, so you can enjoy the service without worrying about data caps.
While Starlink offers great speeds, 5G is still faster, clocking in between 300 and 1,000 Mbps faster than Starlink. Although 5G isn’t as widespread as 4G yet, it’s rapidly expanding.
Setting up your Starlink network is simple. Just stand close to the router, open the Starlink app, and tap ‘Start Setup.’ The app will guide you through the process, including steps to set up your Wi-Fi network name and password.
As you can see, it is not hard to set up Starlink internet satellite for the first time in your home. Just follow the steps above to start using the Elon Musk internet.
If you find this article helpful, kindly share your thoughts in the comment section and follow us on our social media platforms on X (Silicon Africa (@SiliconAfriTech)), Instagram (SiliconAfricaTech), and Facebook (Silicon Africa).